Photoshop is a fantastic application that allows you to turn impossible tasks into reality. This program has an almost infinite number of features and options. However, getting things done here is not easy; you must first become familiar with all of the nooks and crannies. Furthermore, mastering everything in a short period of time is impossible, which is why you begin with the fundamentals.
We have built a blog about a very basic but important aspect of Photoshop. So, take a look at this piece of writing and discover how to make text thicker in Photoshop.
How To Make Text Thicker in Photoshop Step by Step Guide
Step 1: Go to Windows
If you want to know how to make text thicker in Photoshop then at first, you need to type the text or import the writing on Photoshop Illustrator. Then you need to select the text and go to “Windows” then click on “Stroke” then a stroke dialogue box will appear.
Note: If you want to zoom in your texts then press Ctrl then plus “+” and if you want to zoom out press Ctrl then minus “-” for Windows and if you are using Mac then press Cmd then plus “+” for zooming in and Cmd then minus “-“ for zooming out.
Step 2: Change the Weight
After you have zoomed in on your texts, go to the fill option which is at the left bottom corner of the toolbar. Then after the stroke’s dialogue box will appear, and the weight will appear instantly for example 1 pt stroke and if you want bolder text then you can make it to 2 pt or 3 pt.
Step 3: Adjust the Cap, Corner & Align Stroke
After you have decided on “Weight” then you can jump onto Cap, Corner, and Align Stroke. For instance, in the corner option, fix the edges of each text just in case, if you want rounded edges.
Step 4: Align Stroke
Then the align stroke can be selected in turns to pick which alignment would you prefer for instance if you want to align on the outside then you will see that your text will look thicker because the text will have an extra Align Stroke. Therefore, you can adjust all these things according to your needs.
Note: If you want to undo anything then click Ctrl then Z for Windows and cmd then Z if you are using Mac. Also, if you want to view/hide outlines then press Control and then Y for Windows, and for Mac, press Command then Y.
Step 5: Outline Stroke
Now if you don’t want the outline of your texts with stroke then go to Object then click on “Path” and select “Outline Stroke” and then you will see there is a path option on the edge. After this go to “Pathfinder” and a dialogue box will appear from where you need to click on the “Merge” option.
Step 6: Pathfinder & Merge
After this process, even the font size is changed, the thickness of your text will not be changed.
Note: If you want to do the same, increase the thickness of the text but the font is not chosen then go to Type then click on Create Outlines and then you again select the fill option like before from the left side toolbar. Then again go to “Pathfinder” from the right-hand side and select “Merge”.
Frequently Asked Question
How Do I Make the Font Thinner in Photoshop?
First, you need to convert the text to an outline, and to do that go to the “selection tool”. After having selected the Selection tool and choose “Type” and go to “Create Outlines. You can also use the keyboard to do that, press “Ctrl” then “Shift Key” and press “O” for Windows, and for Mac, press “cmd” then “Shift key” and click “O”.
Then select the text and Right-click on “Create Outlines”. After the text has been converted to outlines add a stroke in the stroke panel or Window. In order to do that click on “Stroke” and a dialogue box will appear and select “Align Stroke To Inside”.
Afterward, select the outside paths of the text and delete. It is better to remove the original type path for you to kern the type.
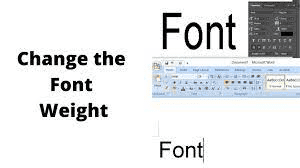
How to Make Fonts Bolder in Photoshop?
Go to the Menu tab on the tool options bar and your Character palette should pop up, if it does not show then go to Window then press on Character.
Now you have to select the text that you want in bold then go to the 3 horizontal lines in the upper right corner of the palette menu. From there you should look for the Faux Bold option and after you click on that your fonts should be in bold.
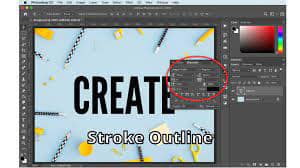
How to Add a Thick Outline in Photoshop?
Create the text with the Type Tool and select Stroke from the effects menu while the Type layer is chosen. Use the slider to adjust the size (in pixels) or type in your own value.
Select the stroke: Inside denotes that the stroke will be placed within the selection’s borders. The stroke center is placed evenly within and outside the selection. The stroke outside runs along the selection’s outside edge.
Blending Mode: This option controls how the colored stroke interacts with the colors beneath it. This works especially well when the text is overlaid on an image. The stroke’s opacity determines how transparent it is.
To access the color picker, click once on the color chip. Choose a stroke color or use a color from the underlying image. To apply your color, click OK. Select OK to apply the effect according to your preferences.
Conclusion
Hopefully, you’ve figured out how to make text thicker in Photoshop by now. We’ve tried to cover all you need to know about working with Photoshop, and one of the most basic features is the ability to make text thicker or thinner. Please contact us if you have any more concerns, and if you have enjoyed our blog, please let us know in the comments section.