Introduction
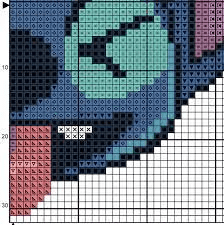
Finding Perler Bead patterns to use for your projects can be difficult if you are new to Perler Beads or even if you have been doing them for a long time. Just in case you are wondering how to make Perler bead patterns in Photoshop then you might learn this by staying with us.
Sometimes all you need is an inspiration to create your own masterpiece, and other times all you need is a simple way to replicate something you’ve seen a hundred times before.
Here, we have shared some of the tools which we apply to create Perler bead patterns. If you’re looking for such patterns, then these resources are wonderful. We have designed an ultimate Perler Bead pattern-making guide using Photoshop. So, let’s get you started.
How to Make Perler Bead Patterns Photoshop
Learn with us how to make Perler bead patterns in Photoshop CC.
Step 1: Converting the Background Into a Smart Object
First, open the picture in Photoshop, and as soon as the picture appears, start changing the background. In order to do that, go to the Layers panel and convert the background into a smart object.
Now, double click on the background and rename it and you may name the layer as “Photo” then click “Ok”. Go to the layer panel and click on the “menu” in the upper right corner and choose “convert to smart object”. Then in the preview thumbnail of the photo, you will see a smart object icon in the lower right corner of it.
Step2: Selecting Solid Color Fill
To add a background color to the effect, you will need to use “solid color fill layer” and to do that, go to the bottom right and choose a solid color, after going in the color picker, choose “Black” and click “OK”. Now you will see a fill layer above your image preview thumbnail.
Step 3: Making Perler Bead Patterns
Now click on the fill layer and drag it on top of the actual image. Now the actual image goes in the top and the fill layer goes to the bottom. You need to select the actual image and go to the “filter” option and choose “pixelate” and then choose “mosaic”.
This will open the filter mosaic dialogue box, now go to the cell size option and drag the cursor from left to right and keep an eye on the picture to select the size, how large squares you want to create your Perler bead patterns, and remember the cell size which you have chosen. Then click “OK” to close the dialogue box.
Step 4: Creating New Document
To create the Perler bead pattern we need to go to the “File” option and choose “new” to open another document and in the new document dialogue box set both the Height and Width, here you have to input the cell size number which you have chosen previously. Set the Resolution to “72” for instance and set the background color to “White” and click Create or “OK” to close the box.
Step 5: Creating a Circle
Now, select the “zoom tool” and then select the white square to zoom in. Now go back to the toolbar and select the “Elliptical Marquee Tool”. Now go the white rectangular image and start making a circle from the top left side and keep on dragging towards the right side and making the circle bigger and keep on pressing the shift key simultaneously, it will fill the entire white rectangular photo, and as soon as you will reach the bottom, release the shift key.
Step 6: Making a Black Circle with White Background
After this, go to the “edit” menu and choose “fill”, now the fill dialogue box will appear, and choose the “Contents” option and choose “Black” color and click “Ok” layer. Now a big black circle will appear on the screen with a white rectangular background. Now, go to the Select option and choose the “Deselect” option in order to remove the selection.
Step 7: Invert the Color of The New Document
Now, if you zoom in close enough you will see a grid pattern which is known as the pixel grid and if you wish to remove it then go up to the “view” option, choose “Show” and then choose “pixel grid” then you will see a black circle with a white rectangular background. Now, you need the opposite of this, you need the circle to be white and the background to be black and in order to do this, go to the “image” menu, choose “adjustments” and then choose “invert”.
Step 8: Closing the New Document
Now, turn the circle into a pattern, go to the “edit” and choose “define pattern” and after that name the pattern as soon as the dialogue box appears and click “OK”. After this, go to the “file” and choose “close” as you don’t need this document for the time being. After this, Photoshop will ask if you want to save it or not and you are supposed to click “NO” here.
Step 9: Adding Layer Mask to The Image
Now, it will take you to the main image document and select the image in the layer panel and click on the “add layer mask” icon. The mask will appear right beside the actual image preview. You need to fill the mask with Perler bead patterns.
Step 10: Fill the Layer Mask with The Perler Bead Pattern
Once again go to the “edit” menu, choose the “fill” icon and this time select the “contents” option and choose “pattern” and click the “custom pattern” thumbnail and choose the custom pattern which you have created a while ago, a white circle with a black background.
This should be seen at the last bottom option in the thumbnail so, after choosing it, click “OK” once again. Now, photoshop will fill the layer mask with your Perler bead pattern. Finally, you can see turning your favorite image into a visible Perler bead pattern and further customization can be done if you want.
Frequently Asked Question
Where Can I Find Perler Bead Patterns?
There are a lot of virtual platforms like Pinterest, Facebook, YouTube, Google, and so on. Pinterest is where I go when I’m looking for Perler Bead patterns. If you’re unfamiliar with Pinterest, it’s a visual bookmarking application that lets you store and share ideas on pretty much everything. Perler Beads aren’t any different.
If you already have an account, all you have to do is type what you’re looking for into their browser, and all the gorgeous pins on that subject will appear. Begin by entering the pattern type you’re seeking for. Let’s assume if you are looking for some cool Star Wars Perler Bead patterns. In their search field, you will have to write “Star Wars Perler Beads” and you can get them in seconds.
Can I Make Perler Bead Patterns in Photoshop?
Perler bead patterns can be made in a variety of ways, including Photoshop. Making Perler bead patterns in Photoshop, on the other hand, is not effortless; you must learn the precise procedures and meticulously follow each step. Making Perler bead patterns should be a breeze if you are attentive enough to follow instructions.
Conclusion
You will face difficulties while doing how to make Perler beads patterns in Photoshop. You will be able to complete this task with ease if you follow our steps and instructions religiously.
If you have enjoyed our blog, be sure to check out our other articles where we discussed everything relevant to photo editing services. Also, please leave your useful remark in the comment box if you have any questions. We look forward to seeing you again shortly.

