Introduction
Everybody wants to use the Photoshop tools that allow us to clean up the line art as we want our work to look flawless every time. This blog is created for you to show how to make lines smooth in Photoshop.
This tutorial will give you everything which you need to know about drawing smooth lines and will provide you with a comprehensive guide along the way. You’ll also learn some extremely important suggestions that will benefit you in all aspects of your career.
Are you all set? If yes, then let’s get this started.
How to Make Lines Smooth in Photoshop
To make a piece of art look great takes a lot of effort and care. As a result, each ink stroke should be as smooth as possible. To make your life easier, we’ll show you how to make lines smooth in Photoshop through this article.
Step 1: Draw a Line
The first step in creating a smooth line is to draw a line on Photoshop’s blank page. After that, you’ll see that the mouse-drawn brushstrokes are uneven and lack a smoothing effect.
Step 2: Use the Smoothing Control
The second step is to detect the smoothing control, which can be found on the brush toolbar, adjacent to the opacity and flow bars, in the top middle section. By default, the toolset is fixed at 10%, which aids in the smoothing of lines when drawing. This option can be used with a brush and an eraser.
The smoothing control must then be set and smoothing settings must be adjusted before you begin drawing. If you want extremely smooth lines, for example, you can set smoothing to 100%. In Photoshop CC 2018 and later versions, there is a feature that smoothes out brush, pencil, and eraser strokes. The name of this feature is brush stroke smoothing.
Step 3: Adjust the Smoothing Percentage
Now let’s get started with the pencil tool, after you have selected the tool, the smoothing effect will be shown at the top and you can decrease or increase the smoothing by moving the slider left and right. You can also tap numbers using your keyboard, for example pressing Alt + 7 to get 70% smoothing. However, remember that you need to press Alt + 0 for 100% smoothing and Alt + 0 and press 0 twice for 0% smoothing.
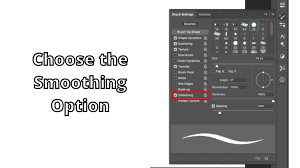
Step 4: Choose the Smoothing Option
Now just beside the smoothing percentage option, you will see four smoothing options in the gear icon. So, click on it and you will see stroke catch up and adjust for zoom options that are selected already by default. Adjust for zoom, increase smoothing when we zoom in, and decrease zooming when we zoom out. With stroke catch up enabled, when we draw a line in the page then the stroke catches up to the current position of the cursor.
With catch up on stroke end enabled, you can draw your line and if you pause then your stroke will catch up to where your cursor is released. When you enable the string mode, it is like a circle with a pointer starting from the middle, and as you start drawing it looks like pulling the string and the circle moves along with the pointer, drawing smooth lines and edges like sharp corners.
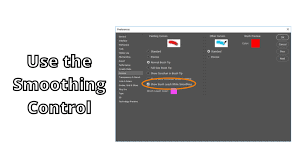
The pointer becomes attached to the stroke when you use the smoothing option. When you apply the Brush Leash, you’ll notice a line connecting the lagging stroke and the cursor. By going to “Edit” then go to “Preferences” and choose “Cursors”, you can switch this feature on and off.
Smoothing line tool options allow you to implement a variety of modes to make working with a Photoshop brush stabilizer easier. It enables you to create images in Photoshop without having to use Illustrator.
How Pulled String Mode Works
In Pulled String mode, the screen will display a line with a circle. The lag of the stroke is indicated by the line, and the circle indicates where you will begin painting. You can’t draw a line until you reach the circle’s edge.
If you need to stop drawing a line and make curves then, this is extremely beneficial. Without mistakenly distorting the image, you can leave the pointer inside the circle. If you wish to change the orientation of the line, this option is also beneficial. The intensity of these modes is affected by the percentage you set.
Slowly drawing shortens the line until it catches up with the cursor. This mode aids in the precise application of the brush. As a result, the movement becomes smoother, and the brush’s speed decreases. If you are not getting the perfect curve then you can go to “filter” then choose “liquify”, now you can easily go over the line and make your desired shape. If you need to draw things with a lot of sharp edges, pair this mode with the Photoshop pencil brush.
Catch up On Stroke End
This mode aids in the completion of the stroke. Because the line jumps from the cursor to the spot where the pen was removed when you remove it from the tablet, the effect can be unpredictable. You can try out multiple modes to see which one suits your needs the best. Keep in mind that you won’t be able to do anything in the pulled-string mode.
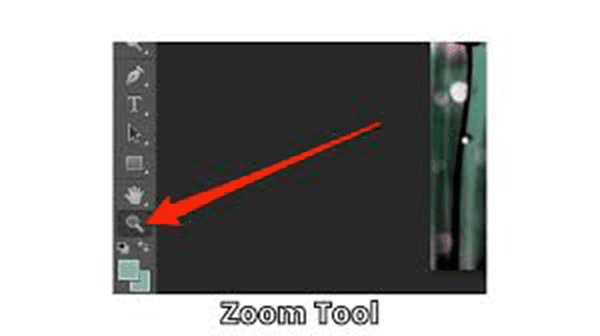
Zoom Tool
Fix the Zoom tool, which will be useful when the line smoothing Photoshop effect is adjusted to 20% and the canvas is displayed at 100%. When you paint on the canvas, it will have a minor smoothing effect. This impact will become more obvious if the canvas is scaled down while the smoothing value remains the same.
The line will grow longer because Photoshop recognizes that a smaller scale demands more smoothing, the line length is automatically modified in response to the zoom level.
Learn uses of Photoshop Zoom Tool
Frequently Asked Question
How Do I Make Smooth Lines in Photoshop?
If you are wondering how to make smooth lines in Photoshop, then you need to have a look at our article above, however if you are thinking of creating smooth straight lines then press B to pick the Brush Tool and click once on your canvas to determine the line’s starting point. Now, while holding Shift, click on a different part of your Canvas. Photoshop will create a perfectly straight brush stroke to link the two locations.
This obviously restricts you to purely vertical or horizontal lines, but at the very least the lines will not be pixelated. However, by holding Shift and clicking in small increments to build a curved shape, you may generate reasonably smooth curves with this method. It’s a little inefficient, but it gets the job done!
How Do I Make Crisp Lines in Photoshop?
To make a crisp line in Photoshop, set the hardness to 100 percent and choose one of the basic brushes, which never seem to lose quality due to scaling.
Smoothing in the brush choices should make the curves smoother, so give it a shot. If you’re drawing with pressure on a tablet, you can make the size regulated by pressure to achieve sharp ends of strokes if that’s what you want.
Conclusion
Whatever you do, from social posts to photo retouching, banners to mesmerizing websites, ordinary image adjustments to comprehensive transformations, Photoshop can make everything look better.
If you use Photoshop regularly then, you should know how to make smooth lines in Photoshop. Hopefully, we’ve provided you with enough knowledge so that you won’t have any difficulties drawing your piece of art in Photoshop.
People have a tendency to use a lot of things at once and fail to understand the fundamentals. So, here’s a simple lesson for you, and if you enjoyed it, please let us know in the comments section.
Read Also: How to Make Text Thicker in Photoshop