It takes time and patience to get a flawless image. Working in Photoshop is neither too simple nor too difficult; all you need is a thorough understanding of the technique. Working with Photoshop, users want the image to be perfect in every way possible, even the minor details matter here.
This is why, in a few simple steps, we’ll show you how to color in Photoshop without going over lines. So that you can perform it in a matter of minutes. Let’s get this started without further delay.
How to Color in Photoshop without Going Over Lines
Step 1: Set the Brush
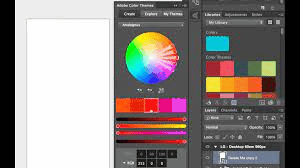
To begin learning how to color in Photoshop without going over lines, open your document in Photoshop, then pick the brush tool, select the brush preset, and then choose the hard brush. After that, select a color from the color picker on the far right side of the screen.
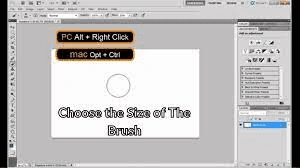
Step 2: Choose the Size of The Brush
Now, depending on the type of image you’re going to color, you’ll need to adjust the size of your brush. After that, use the color picker to select a color and begin coloring each portion of the image. There is an option to add another layer to your image if you want to add more colors. When you add another layer, the previous color option will shift to the next level.
Step 3: Add Another Color
Now give that layer the name of the next color you wish to use, and drag it down on top of the previous color. For example, if you applied blue color first, the blue color option will slip down below the layer option when you add another layer.
The following color (for example, yellow) will now display in the layer option. You must now drag it down on top of the blue color and begin coloring your image in yellow. Following that, you can add as many colors as you want, and repeat the process to keep adding more colors to your image.
Step 4: Change Color Lines
If you want to alter the color of the lines, go to the Lines option and press duplicate layer. On the top of that area, you’ll see a new option called color hold, which you should pick, and then go to color overlay from the right bottom part where it’s written Fx. The layer style and color picker dialogue box will display after that, and you can easily pick a color and click OK.
Step 5: Change the Background Color
If you wish to alter the background color, go to the background option and select the solid color option. A color picker will appear, and you may choose your chosen shade from there.
Finally, if you wish to add shading to your image, you must adjust the gradient. To do so, select another color, such as yellow, then go to the hold control and click on the layer after selecting the yellow color option.
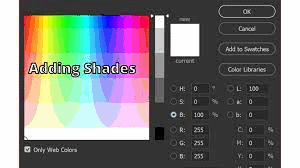
Step 6: Adding Shades
After that, a dotted pattern will develop around the appropriate region, and once you see it, go to the paint bucket and select the gradient tool, and another color will appear on the upper right-hand side. You must select another color from there, and once you have done so, set your cursor in the desired location and drag it down from the top to the bottom of that particular section.
If you choose yellow as the primary color and then change it to orange after applying the gradient, your image will display the shading of orange to yellow. You can continue to add other portions of your image in the same way.
As previously stated, you will need some practice with all of the steps of how to color in Photoshop without going over lines. It is obvious that you may not be able to capture everything on your first try. As a result, go through each step one by one, and hopefully, you will be able to do it without difficulty.
Frequently Asked Question
How Do You Not Color-Overline Art?
Use a hard brush tool with zero spacing and go over the line art manually, and once you have outlined the shape, grab the magic wand tool and select the inside and go to the select option, go to modify then expand then choose your pixels and press OK. Then go to edit and choose to fill then pick your desired color and press OK.
How to Color Correct a Specific Area in Photoshop?
To begin, open a photo that has a colored object that you want to change. You don’t want to modify the full photo; instead, you want to make a selection to limit the effects of the adjustment. Use the polygonal lasso tool to do this kind of selection.
Select the edge of the region you wish to exclude by clicking on it. Move along the boundary in a straight line to the next region, clicking around until the polygonal lasso tool back to where you started. Hover your mouse over the initial location to see a circle appear over the cursor, then click to complete the selection.
After you’ve picked the regions you don’t want to change the color of, inverse the selection to select all of the desired areas you want to modify the color of. Select “Inverse” from the “Select” menu. Then go to Layer, New Adjustment Layer, Hue/Saturation, and add a new adjustment layer to the selected pixels.
Press “OK” to name the new adjustment layer. To acquire different colors, change the hue to different numbers. Finally, click “OK” to modify the color of the selected areas to your preference.
Conclusion
Photoshop can play with your time if you don’t put it to good use. As a result, you must conduct extensive research on the task at hand. Hopefully, by now, you’ve figured out how to color in Photoshop without going over the lines. We’ve tried to include all of the steps you’ll need to know before starting to color your image in Photoshop.
Also, we tried to include the items that are relevant to it, and you must be familiar if you are a regular Photoshop-users. If you have any more questions, please contact us, and if you enjoyed this piece of writing then leave us your useful feedback and comments.